Note
Access to this page requires authorization. You can try signing in or changing directories.
Access to this page requires authorization. You can try changing directories.
This article walks you through the complete conversational language understanding (CLU) fine-tuning lifecycle in Microsoft Foundry: build a schema, label your utterances, train and evaluate a model, deploy it, and send prediction requests. Each stage links to the relevant concepts and reference content if you want to go deeper.
For an end-to-end introduction with a preconfigured sample project, see the CLU quickstart. For the broader process, see the project development lifecycle.
Prerequisites
An active Azure subscription. If you don't have one, you can create one for free.
Requisite permissions. Make sure the person establishing the account and project is assigned as the Foundry Account Owner role at the subscription level. Alternatively, having either the Contributor or Cognitive Services Contributor role at the subscription scope also meets this requirement. For more information, see Role based access control (RBAC).
Important
The Foundry RBAC roles were recently renamed. Foundry User, Foundry Owner, Foundry Account Owner, and Foundry Project Manager were previously named Azure AI User, Azure AI Owner, Azure AI Account Owner, and Azure AI Project Manager. You might still see the previous names in some places while the rename rolls out. The role IDs and core permissions are unchanged by the rename.
A project created in the Microsoft Foundry. For more information, see Create a Foundry project and Create a fine-tuning task project.
Build your fine-tuning schema
In conversational language understanding projects, the schema is the combination of intents and entities within your project. Schema design is a crucial part of your project's success. When you create a schema, think about which intents and entities should be included.
Guidelines and recommendations
Consider the following guidelines when you choose intents for your project:
- Create distinct, separable intents. An intent is best described as an action that the user wants to perform. Identify all the different actions that your users might take when they interact with your project. Sending, calling, and canceling are all actions that are best represented as different intents. "Canceling an order" and "canceling an appointment" are similar, with the distinction being what they're canceling. Those two actions should be represented under the same intent, cancel.
- Create entities to extract relevant pieces of information within your text. Entities capture the information needed to fulfill your user's action. For example, order or appointment could be different things that a user is trying to cancel, and you should create an entity to capture that piece of information.
You can "send a message," "send an email," or "send a package." Creating an intent to capture each of those requirements won't scale over time, and you should use entities to identify what the user was sending. The combination of intents and entities should determine your conversation flow.
For example, consider a company where the bot developers identified the three most common actions that their users take when they use a calendar:
- Set up new meetings.
- Respond to meeting requests.
- Cancel meetings.
They might create an intent to represent each of these actions, along with entities to help complete them, such as:
- Meeting attendants
- Date
- Meeting durations
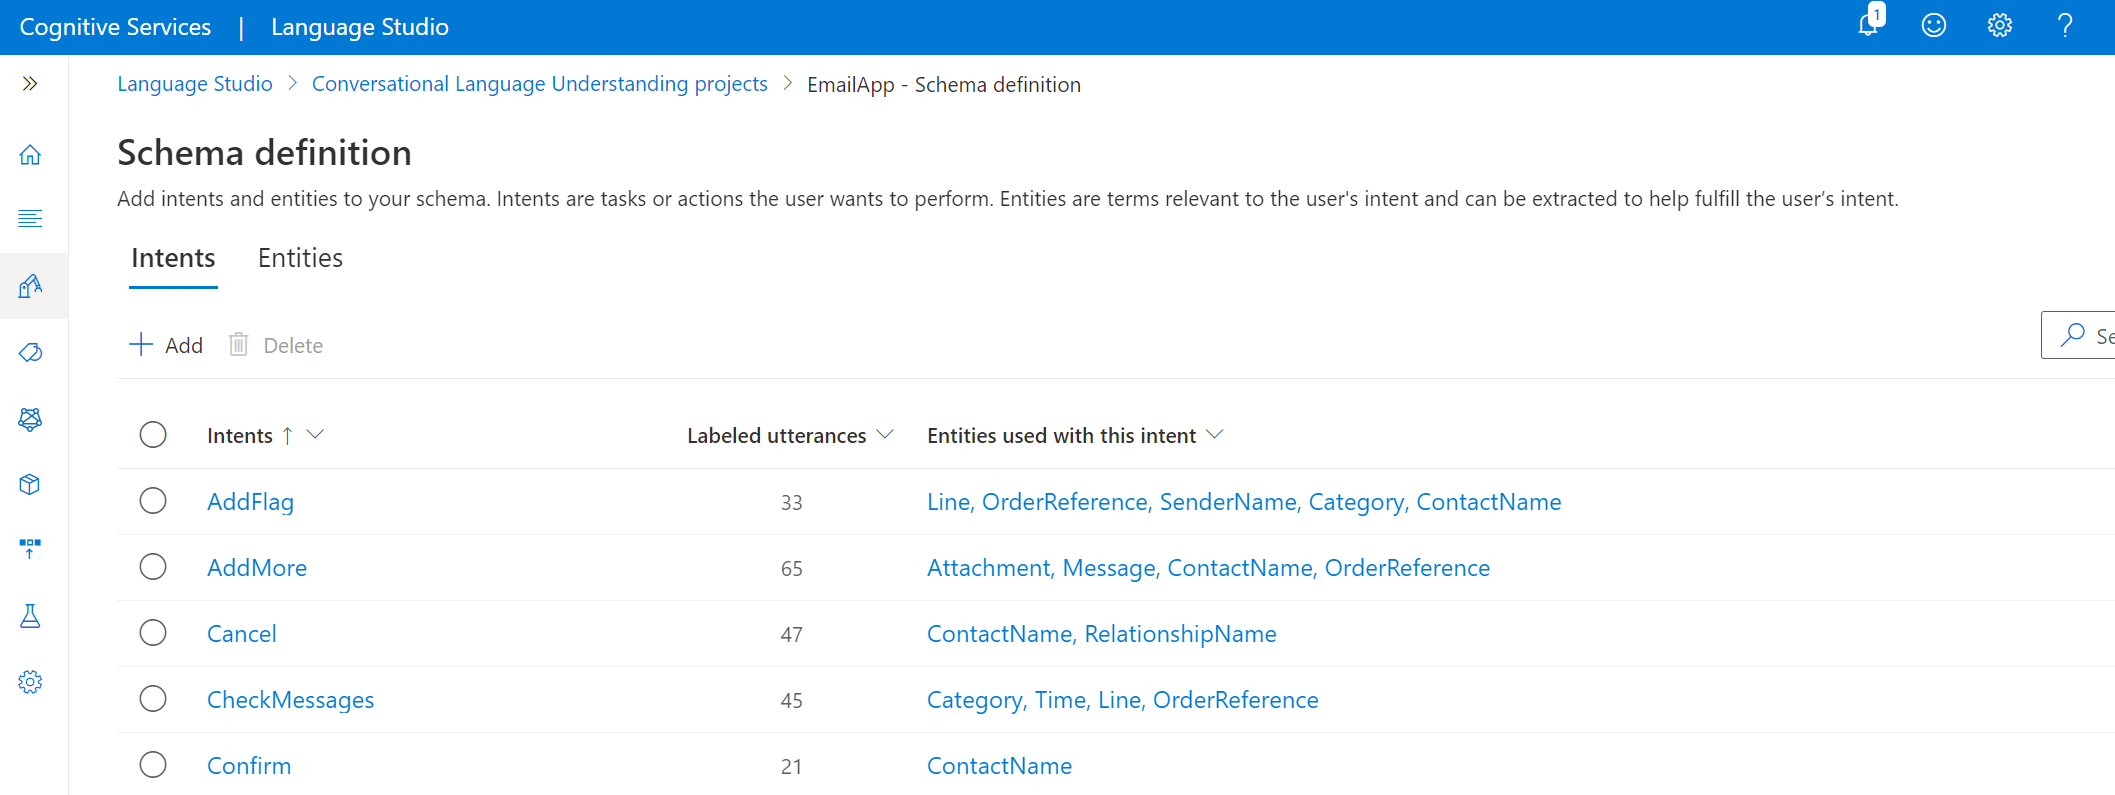
Add intents
To build a project schema within Foundry:
On the left pane, select Define schema.
Select the Intents or Entities tabs.
To create an intent, select + Add intent. You're prompted to enter names and descriptions for as many intents as you want to create. Descriptions are required only for using the Quick Deploy option to help Azure OpenAI better understand the context of your intents.
Repeat the steps to develop intents that encompass all the actions that the user is likely to perform while interacting with the project.

Add entities
Select the Entities tab.
To add an entity, select + Add entity. You're prompted to enter a name to create the entity.
After you create an entity, you can select the entity name to change the Entity components type. Multiple components like learned, list, regex, or prebuilt are used to define every entity. A learned component is added to all your entities after you label them in your utterances.
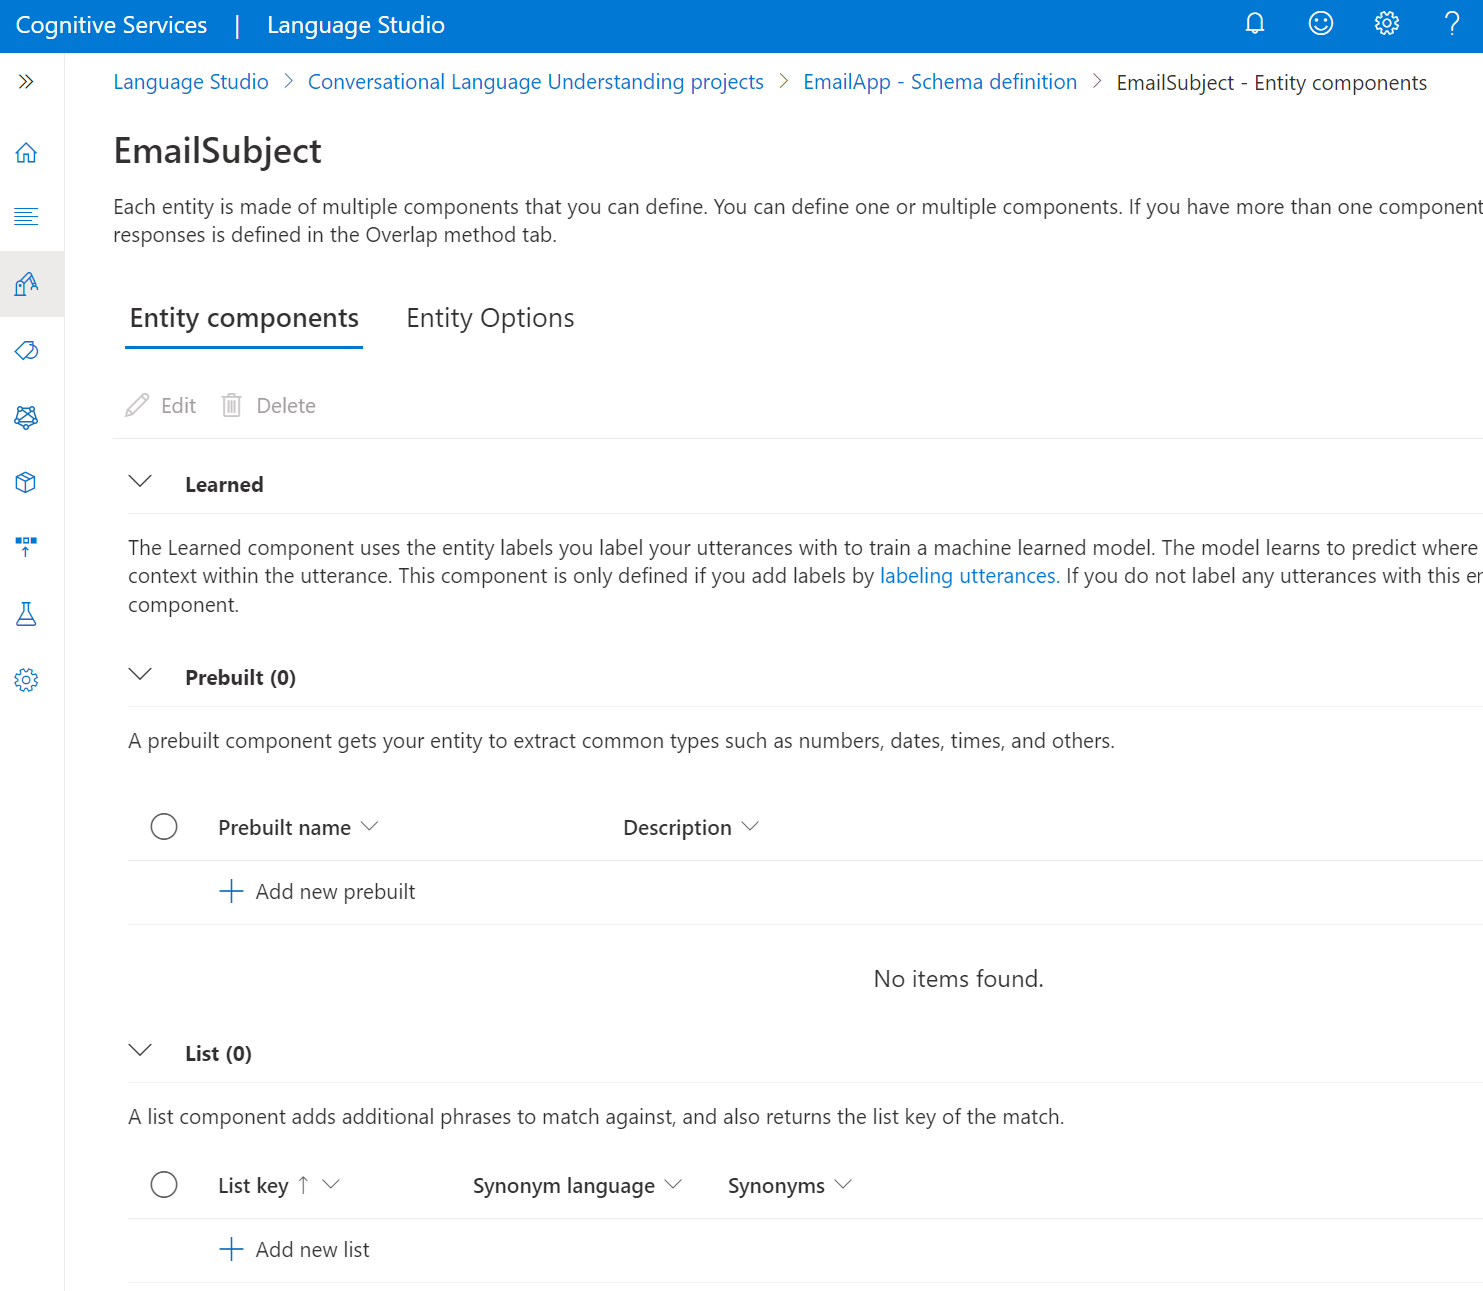
You can also add a list, regex, or prebuilt component to each entity.

Add a prebuilt component
To add a prebuilt component, select the prebuilt type from the dropdown menu in the Entity options section.
Add a list component
To add a list component, select Add list. You can add multiple lists to each entity:
Create a new list, and in the List key text box, enter the normalized value that was returned when any of the synonyms values were extracted.
Enter your synonyms and select Enter after each one. We recommend having a synonym list in multiple languages.
Add a regex component
To add a regex component, select Add expression. Name the regex key, and enter a regular expression that matches the entity to be extracted.
Define entity options
Select the Entity Options tab on the entity details page. When multiple components are defined for an entity, their predictions might overlap. When an overlap occurs, each entity's final prediction is determined based on the entity option that you select in this step. Select the option that you want to apply to this entity, and then select Save.
After you create your entities, you can come back and edit them. You can edit entity components or delete them by selecting Edit or Delete.
Label your utterances
After you build a schema for your fine-tuning task, you add training utterances to your project. The utterances should be similar to what your users use when they interact with the project. When you add an utterance, you assign which intent it belongs to. After the utterance is added, label the words within your utterance that you want to extract as entities.
Data labeling is a crucial step in the CLU trained development lifecycle. This data is used in the next step when you train your model so that your model can learn from the labeled data. If you already labeled utterances, you can directly import them into your project, if your data follows the accepted data format. Labeled data informs the model about how to interpret text and is used for training and evaluation.
Tip
Use the Quick Deploy option to implement custom CLU intent routing, which is powered by your own large language model deployment without adding or labeling any training data.
Data labeling guidelines
Labeling your data is important so that your model knows which sentences and words are associated with the intents and entities in your project. Spend time labeling your utterances to introduce and refine the data that's used in training your models.
As you add utterances and label them, keep in mind:
The machine learning models generalize based on the labeled examples that you provide. The more examples that you provide, the more data points the model has to make better generalizations.
The precision, consistency, and completeness of your labeled data are key factors to determining model performance:
- Label precisely: Label each intent and entity to its right type always. Only include what you want classified and extracted. Avoid unnecessary data in your labels.
- Label consistently: The same entity should have the same label across all the utterances.
- Label completely: Provide varied utterances for every intent. Label all the instances of the entity in all your utterances.
Clearly label utterances
Ensure that the concepts that your entities refer to are well defined and separable. Check if you can easily determine the differences reliably. If you can't, this lack of distinction might indicate difficulty for the learned component.
Ensure that some aspect of your data can provide a signal for differences when there's a similarity between entities.
For example, if you built a model to book flights, a user might use an utterance like "I want a flight from Boston to Seattle." The origin city and destination city for such utterances would be expected to be similar. A signal to differentiate origin city might be that the word from often precedes it.
Ensure that you label all instances of each entity in both your training and testing data. One approach is to use the search function to find all instances of a word or phrase in your data to check if they're correctly labeled.
Ensure that you label test data for entities without learned components and also for the entities with them. This practice helps to ensure that your evaluation metrics are accurate.
For multilingual projects, adding utterances in other languages increases the model's performance in these languages. Avoid duplicating your data across all the languages that you want to support. For example, to improve a calendar bot's performance with users, a developer might add examples mostly in English and a few in Spanish or French. They might add utterances such as:
Set a meeting with **Matt** and **Kevin** **tomorrow** at **12 PM**.(English)Reply as **tentative** to the **weekly update** meeting.(English)Cancelar mi **próxima** reunión.(Spanish)
Label your utterances in Foundry
Use the following steps to label your utterances:
Go to your project page in Microsoft Foundry.
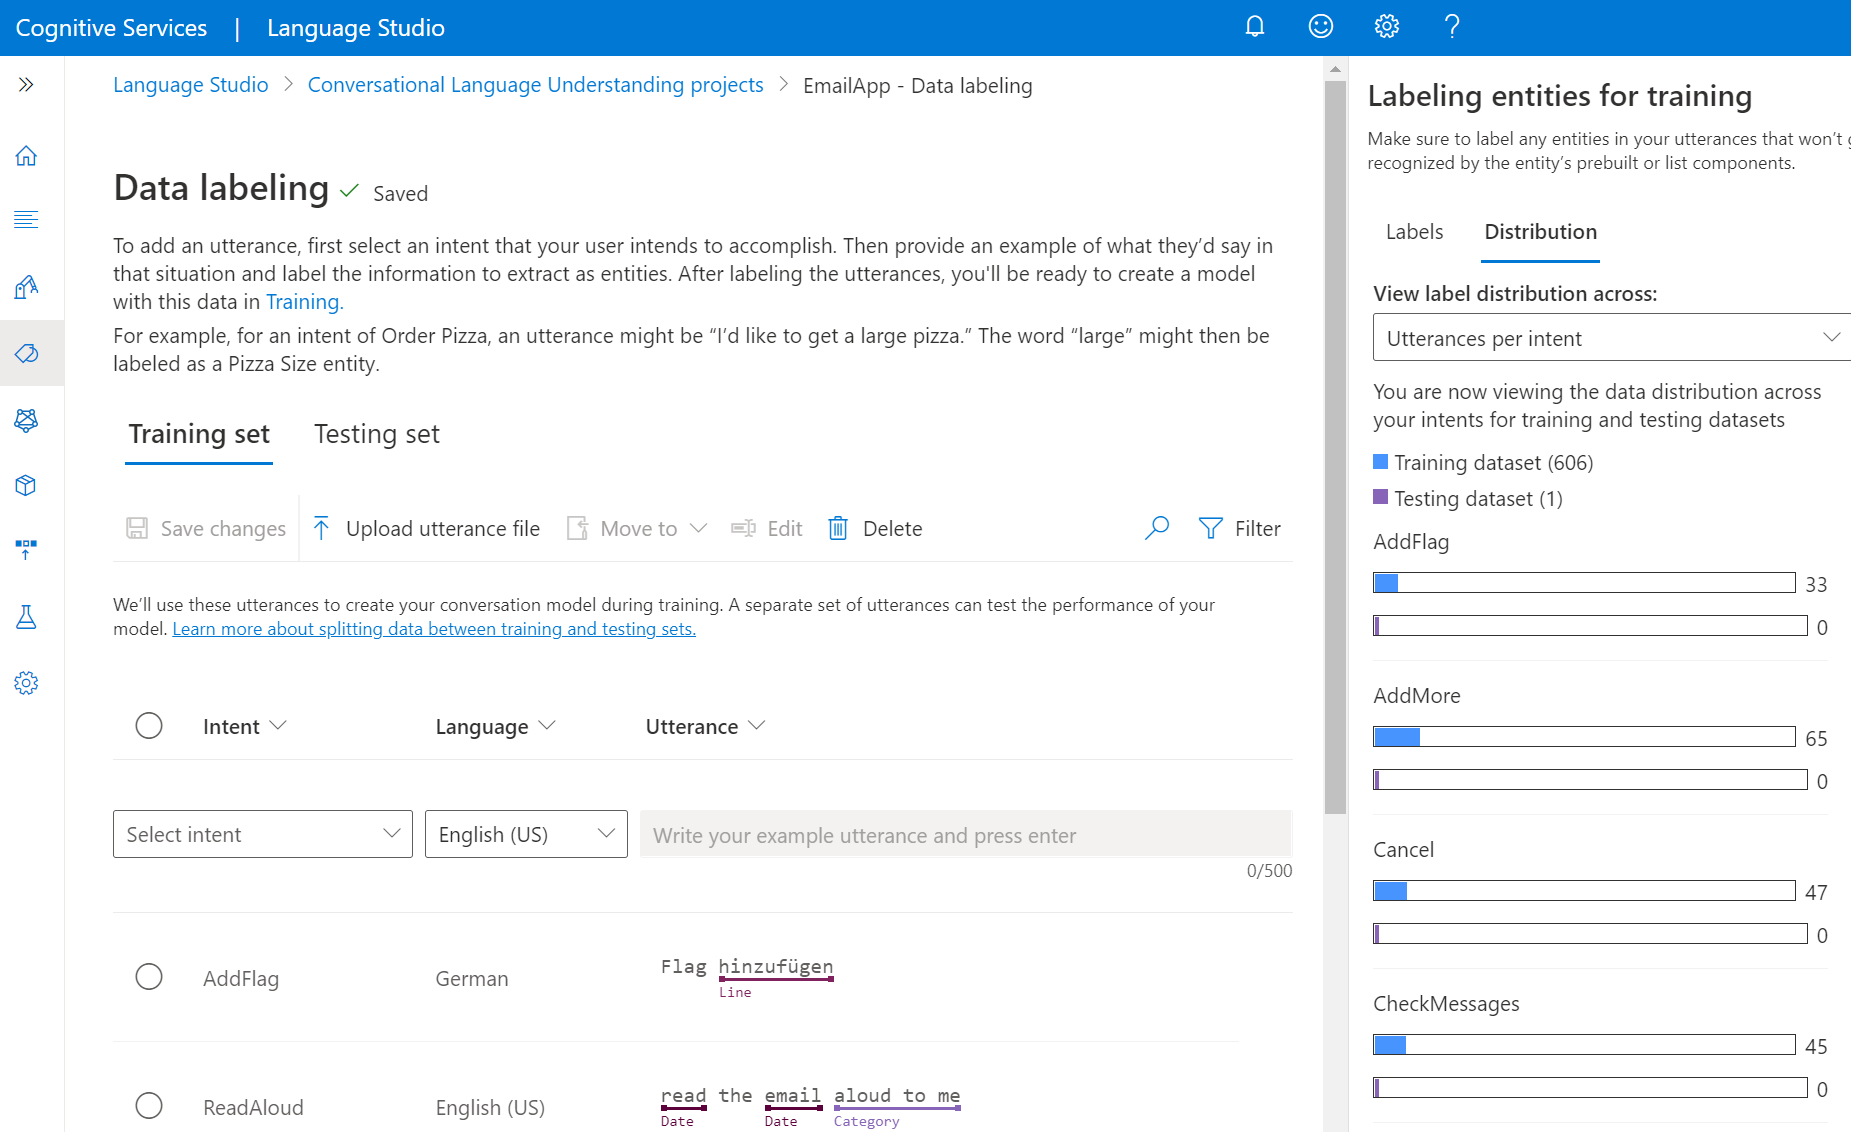
On the left pane, select Manage data. On this page, you can add your utterances and label them. You can also upload your utterances directly by selecting Upload utterance file from the top menu. Make sure to follow the accepted format.
By using the top tabs, you can change the view to Training set or Testing set. Learn more about training and testing sets and how they're used for model training and evaluation.

Tip
If you plan to use Automatically split the testing set from training data splitting, add all your utterances to the training set.
From the Select intent dropdown menu, select one of the intents, the language of the utterance (for multilingual projects), and the utterance itself. Press the Enter key in the utterance's text box and add the utterance.
You have two options to label entities in an utterance:
Option Description Label by using a brush Select the brush icon next to an entity in the pane on the right, and then highlight the text in the utterance that you want to label. Label by using inline menu Highlight the word that you want to label as an entity, and a menu appears. Select the entity that you want to label these words with. In the pane on the right, on the Labels tab, you can find all the entity types in your project and the count of labeled instances per each one.
On the Distribution tab, you can view the distribution across training and testing sets. You have these options for viewing:
- Total instances per labeled entity: You can view the count of all labeled instances of a specific entity.
- Unique utterances per labeled entity: Each utterance is counted if it contains at least one labeled instance of this entity.
- Utterances per intent: You can view the count of utterances per intent.


Note
List, regex, and prebuilt components aren't shown on the data labeling page. All labels here apply to the learned component only.
To remove a label:
- From within your utterance, select the entity from which you want to remove a label.
- Scroll through the menu that appears, and select Remove label.
To delete an entity:
- Select the garbage bin icon next to the entity that you want to edit in the pane on the right.
- Select Delete to confirm.
Suggest utterances with Azure OpenAI
In CLU, use Azure OpenAI to suggest utterances to add to your project by using generative language models. We recommend that you use a Foundry resource while you use CLU so that you don't need to connect multiple resources.
To use the Foundry resource, you need to provide your Foundry resource with elevated access. To do so, access the Azure portal. Within your Azure AI resource, provide access as a Cognitive Services User to itself. This step ensures that all parts of your resource are communicating correctly.
Connect with separate Language and Azure OpenAI resources
You first need to get access and create a resource in Azure OpenAI. Next, create a connection to the Azure OpenAI resource within the same Foundry project in the Management center on the left pane of the Foundry page. You then need to create a deployment for the Azure OpenAI models within the connected Azure OpenAI resource. To create a new resource, follow the steps in Create and deploy an Azure OpenAI in Foundry Models resource.
Before you get started, the suggested utterances feature is available only if your Language resource is in the following regions:
- East US
- South Central US
- West Europe
On the Data labeling page:
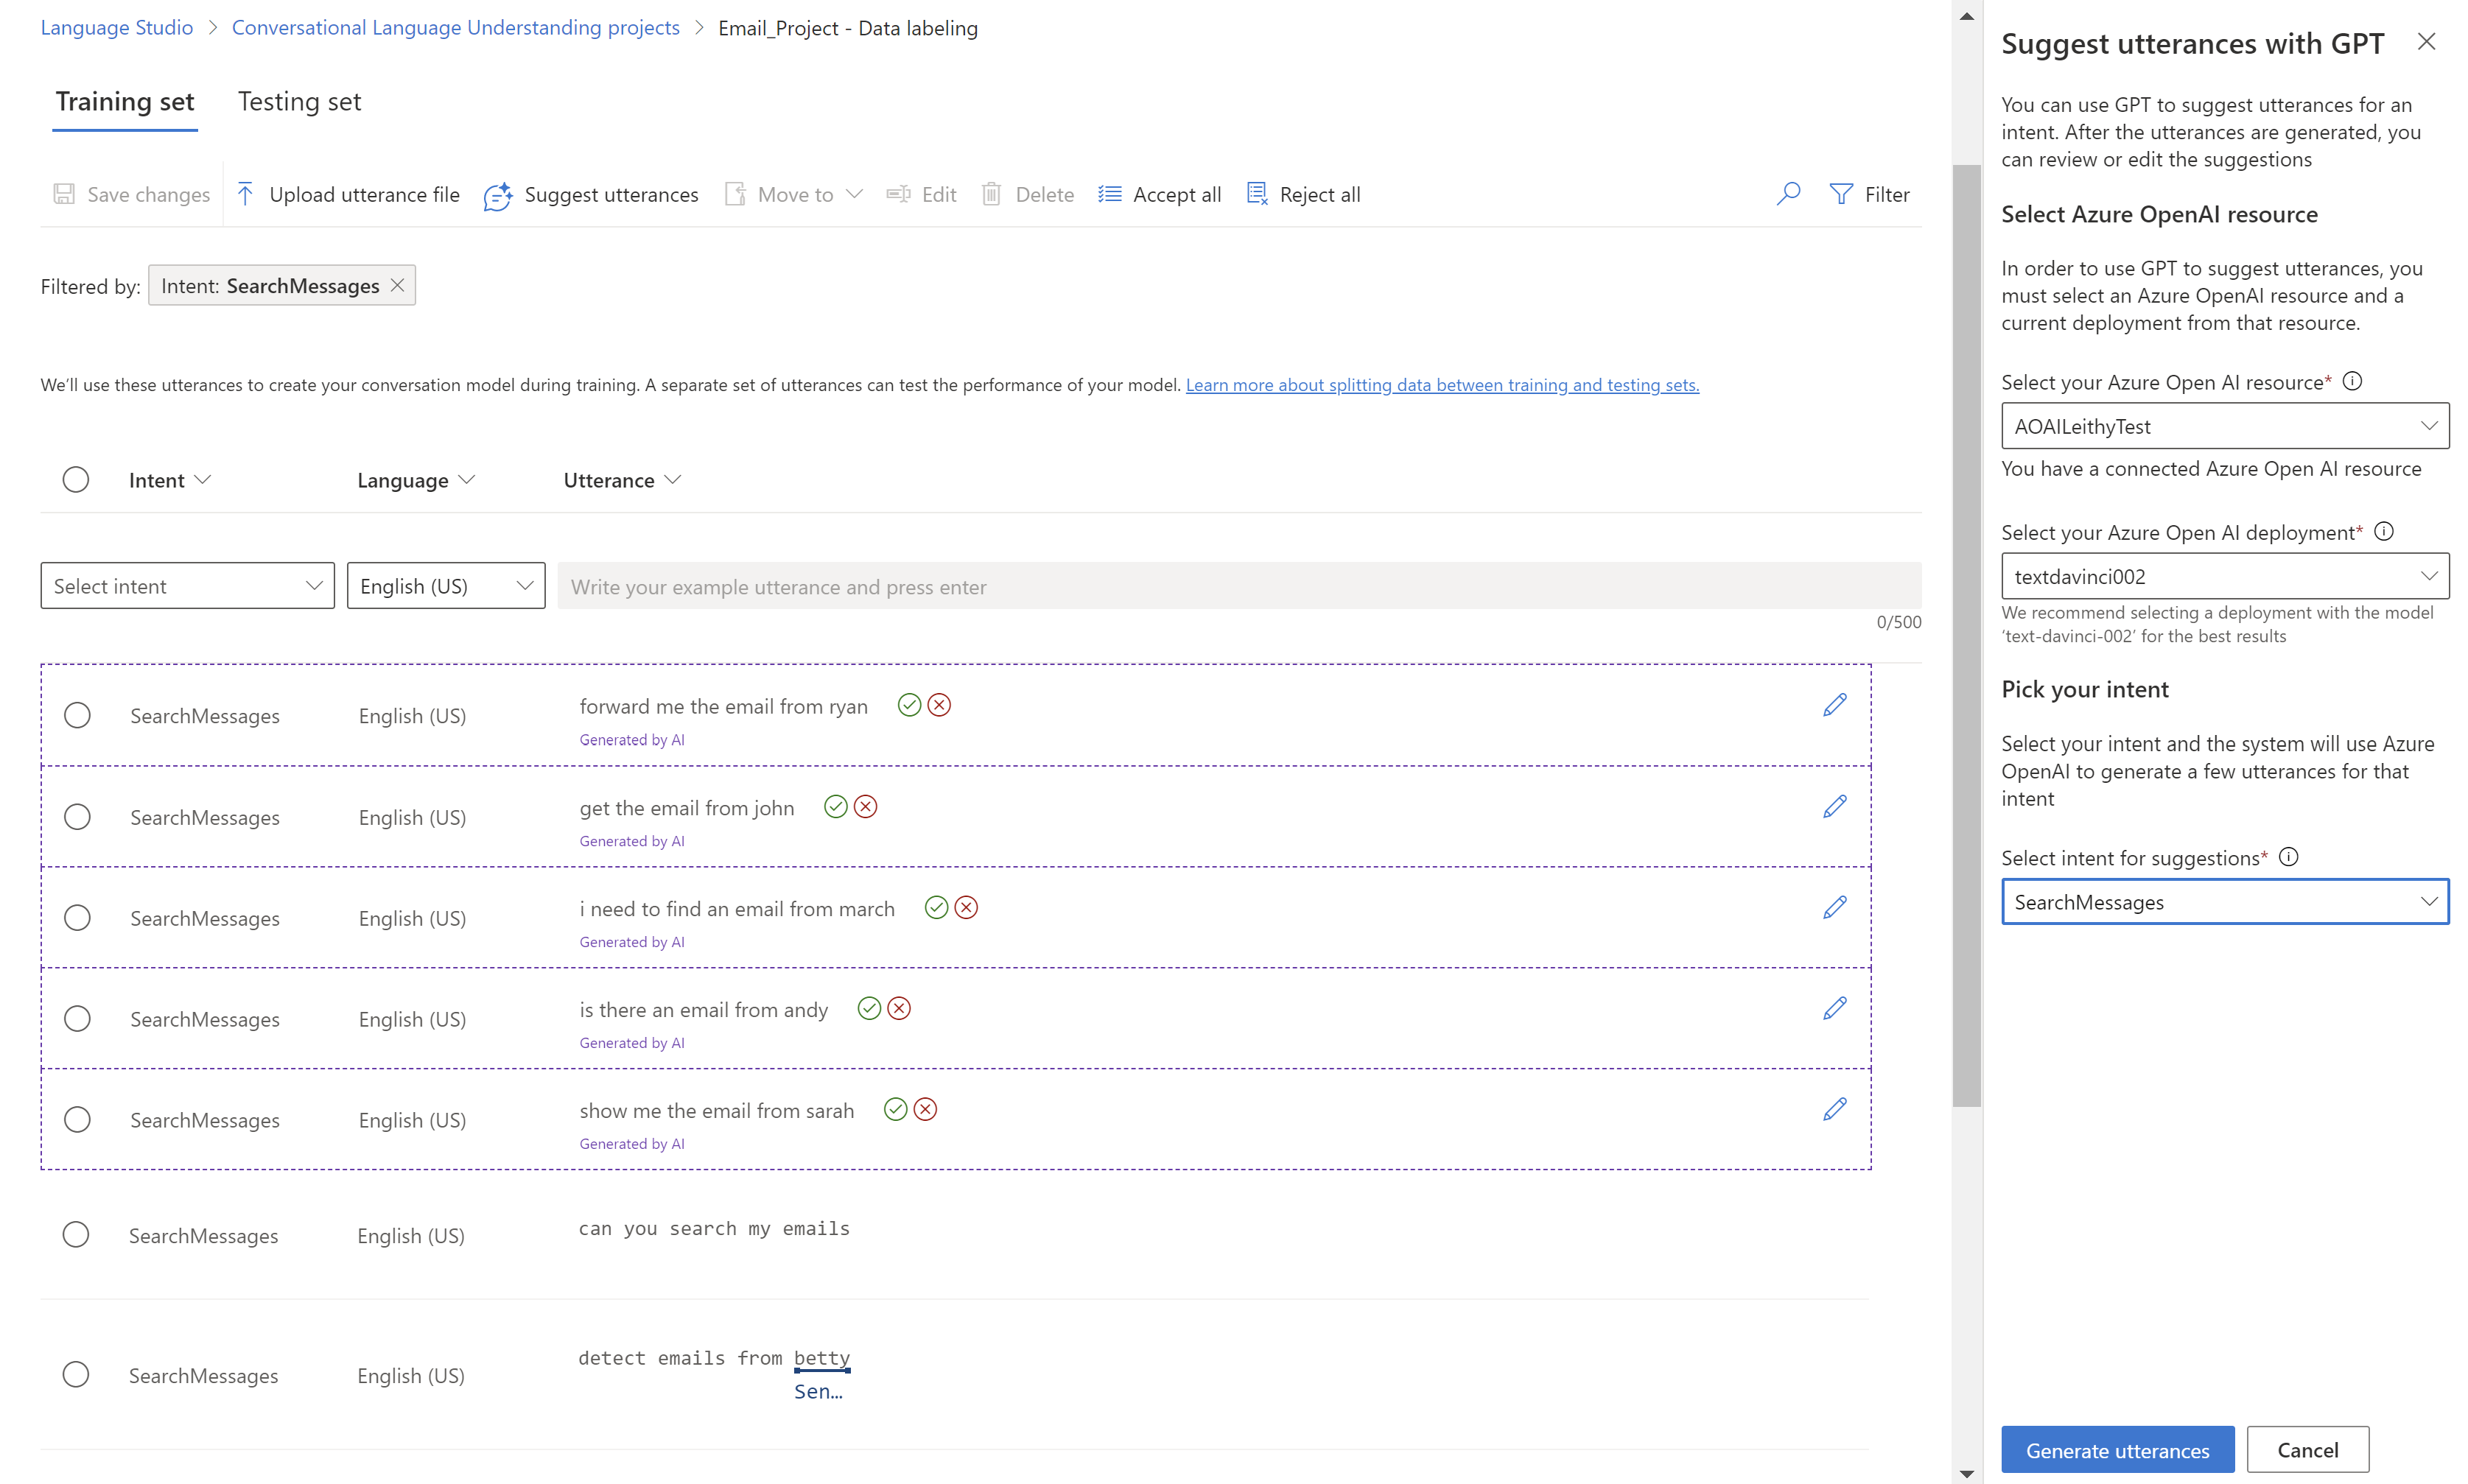
Select Suggest utterances. A pane opens and prompts you to select your Azure OpenAI resource and deployment.
After you select an Azure OpenAI resource, select Connect so that your Language resource has direct access to your Azure OpenAI resource. It assigns your Language resource the Cognitive Services User role to your Azure OpenAI resource. Now your current Language resource has access to Azure OpenAI. If the connection fails, follow these steps to manually add the correct role to your Azure OpenAI resource.
After the resource is connected, select the deployment. The model that we recommend for the Azure OpenAI deployment is
gpt-35-turbo-instruct.Select the intent for which you want to get suggestions. Make sure the intent that you selected has at least five saved utterances to be enabled for utterance suggestions. The suggestions provided by Azure OpenAI are based on the most recent utterances that you added for that intent.
Select Generate utterances.
The suggested utterances show up with a dotted line around them and the note Generated by AI. Those suggestions must be accepted or rejected. Accepting a suggestion adds it to your project, as if you had added it yourself. Rejecting a suggestion deletes it entirely. Only accepted utterances are part of your project and used for training or testing.
To accept or reject, select the green check mark or red cancel buttons beside each utterance. You can also use Accept all and Reject all on the toolbar.

Use of this feature entails a charge to your Azure OpenAI resource for a similar number of tokens to the suggested utterances that are generated. For information on Azure OpenAI pricing, see Azure OpenAI Service pricing.
Add required configurations to Azure OpenAI resource
Enable identity management for your Language resource by using the following options.
Your Language resource must have identity management. To enable it by using the Azure portal:
- Go to your Language resource.
- On the left pane, under the Resource Management section, select Identity.
- On the System assigned tab, set Status to On.
After you enable managed identity, assign the Cognitive Services User role to your Azure OpenAI resource by using the managed identity of your Language resource.
Sign in to the Azure portal and go to your Azure OpenAI resource.
Select the Access Control (IAM) tab.
Select Add > Add role assignment.
Select Job function roles and select Next.
Select Cognitive Services User from the list of roles, and select Next.
Select Assign access to: Managed identity and choose Select members.
Under Managed identity, select Language.
Search for your resource and select it. Then select Next and complete the process.
Review the details and select Review + assign.

After a few minutes, refresh Foundry, and you can successfully connect to Azure OpenAI.
Train your model
After you complete labeling your utterances, you can start training a model. Training is the process where the model learns from your labeled utterances. To train a model, start a training job. Only successfully completed jobs create a model. Training jobs expire after seven days, then you can no longer retrieve the job details. If your training job completed successfully and a model was created, the job doesn't expire. You can only have one training job running at a time, and you can't start other jobs in the same fine-tuning task.
Note
When using the Quick Deploy option, CLU automatically creates an instant training job to set up your CLU intent router using your selected LLM deployment.
Model evaluation is triggered automatically after training is completed successfully. The evaluation process starts by using the trained model to run predictions on the utterances in the testing set, and compares the predicted results with the provided labels (which establishes a baseline of truth).
Balance training data
When it comes to training data, try to keep your schema well-balanced. Including large quantities of one intent and few of another results in a model with bias towards particular intents.
To address this scenario, you might need to down sample your training set. Or you might need to add to it. To down sample, you can:
- Get rid of a certain percentage of the training data randomly.
- Analyze the dataset and remove overrepresented duplicate entries, which is a more systematic manner.
To add to the training set, in Microsoft Foundry, on the Data labeling tab, select Suggest utterances. CLU sends a call to Azure OpenAI to generate similar utterances.
You should also look for unintentional patterns in the training set. For example, look to see if the training set for a particular intent is all lowercase or starts with a particular phrase. In such cases, the model you train might learn these unintended biases in the training set instead of being able to generalize.
We recommend that you introduce casing and punctuation diversity in the training set. If your model is expected to handle variations, be sure to have a training set that also reflects that diversity. For example, include some utterances in proper casing and some in all lowercase.
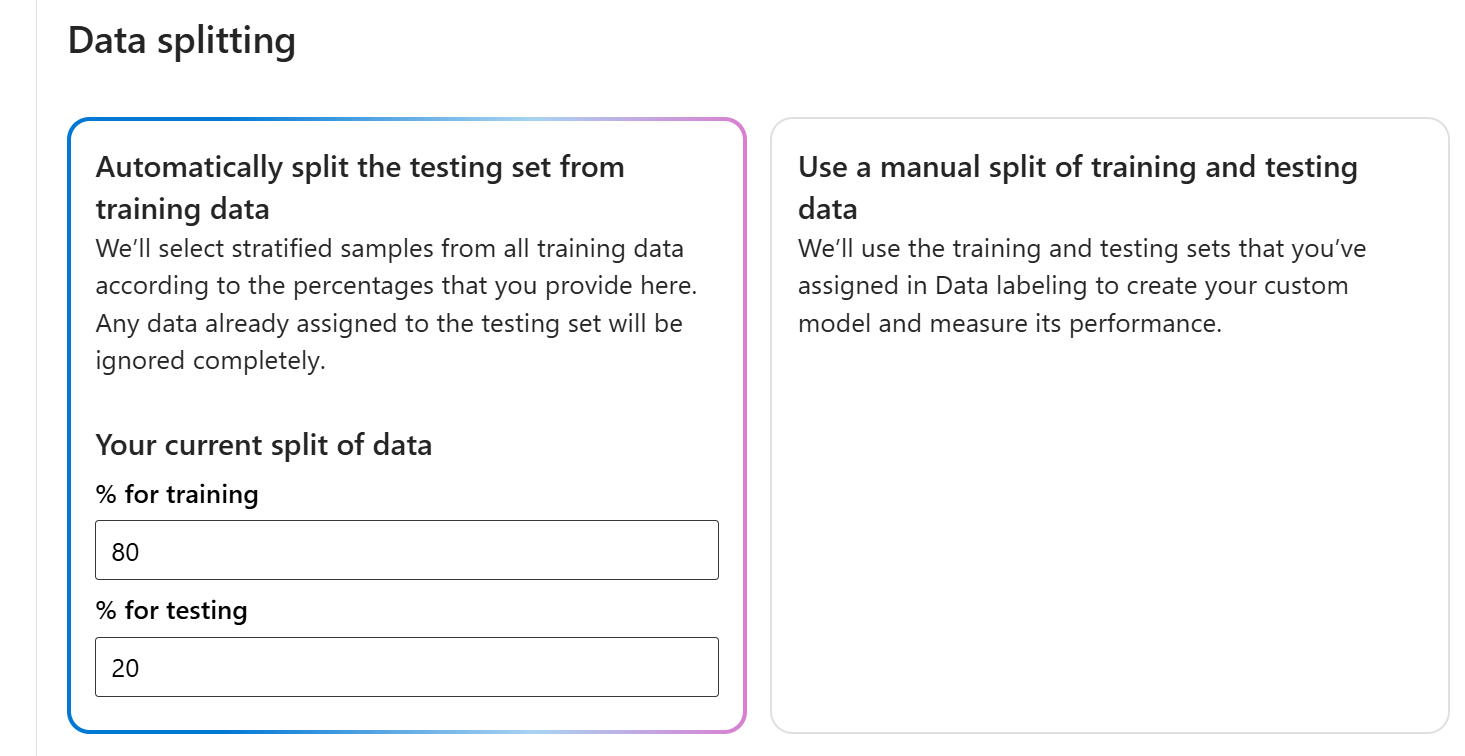
Data splitting
Before you start the training process, labeled utterances in your project are divided into a training set and a testing set. Each one serves a different function:
- The training set is used in training the model, the set from which the model learns the labeled utterances.
- The testing set is a blind set that isn't introduced to the model during training but only during evaluation.
After the model is trained successfully, the model can be used to make predictions from the utterances in the testing set. These predictions are used to calculate evaluation metrics. We recommend that you make sure that all your intents and entities are adequately represented in both the training and testing set.
CLU supports two methods for data splitting:
- Automatically splitting the testing set from training data: The system splits your tagged data between the training and testing sets, according to the percentages you choose. The recommended percentage split is 80% for training and 20% for testing.
Note
If you choose the Automatically splitting the testing set from training data option, only the data assigned to a training set is split according to the percentages provided.
- Use a manual split of training and testing data: This method enables users to define which utterances should belong to which set. This step is only enabled if you added utterances to your testing set during labeling.
Training modes
CLU supports two modes for training your models:
Standard training uses fast machine learning algorithms to quickly train your models. This training level is currently only available for English and is disabled for any project that doesn't use English (US), or English (UK) as its primary language. This training option is free of charge. Standard training allows you to add utterances and test them quickly free of charge. The evaluation scores shown should guide you on where to make changes in your project and add more utterances. While standard training is best for testing and updating your model quickly, you should see better model quality when using advanced training. Once you iterate a few times and made incremental improvements, you can consider using advanced training to train another version of your model.
Advanced training uses the latest in machine learning technology to customize models with your data. This training level is expected to show better performance scores for your models and enables you to use the multilingual capabilities of CLU as well. Advanced training is priced differently. See the pricing information for details.
Use the evaluation scores to guide your decisions. There may be times where a specific example is predicted incorrectly in advanced training as opposed to when you used standard training mode. However, if the overall evaluation results are better using advanced training, then we recommend that you use that model as your final model. If that isn't the case and you aren't looking to use any multilingual capabilities, you can continue to use a model trained with standard mode.
Note
You should expect to see a difference in behaviors in intent confidence scores between the training modes as each algorithm calibrates their scores differently.
Start a training job
Navigate to the Foundry.
If you aren't already signed in, the portal prompts you to do so with your Azure credentials.
Once signed in, you can create or access your existing projects within Foundry.
If you're not already at your project for this task, select it.
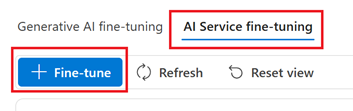
Select Fine-tuning from the left navigation pane.

Select the AI Service fine-tuning tab and then + Fine-tune button.
From Create service fine-tuning window, choose the Conversational language understanding tab then select Next.

In Create CLU fine tuning task window, select your Connected service from the drop-down menu, then complete the Name and Language fields. If you're using the free Standard Training mode, select English for the language field.
Select the Create button. It may take a few minutes for the operation to complete.
From the immediate left navigation pane, choose Train model.
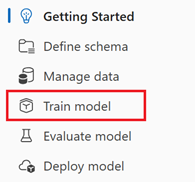
Next, select the + Train model button from the main window.
In the Train a new model window, select one of the following:
- Create a new training model. Enter a new Model name
- Overwrite an existing model name. Replace an existing model trained on the new data.
Select Your current training version. The training version is the algorithm that determines how your model learns from your data. The machine learning used to train models is regularly updated. We recommend using the latest version for training, as it underwent thorough testing and provides the most balanced model predictions from your data.
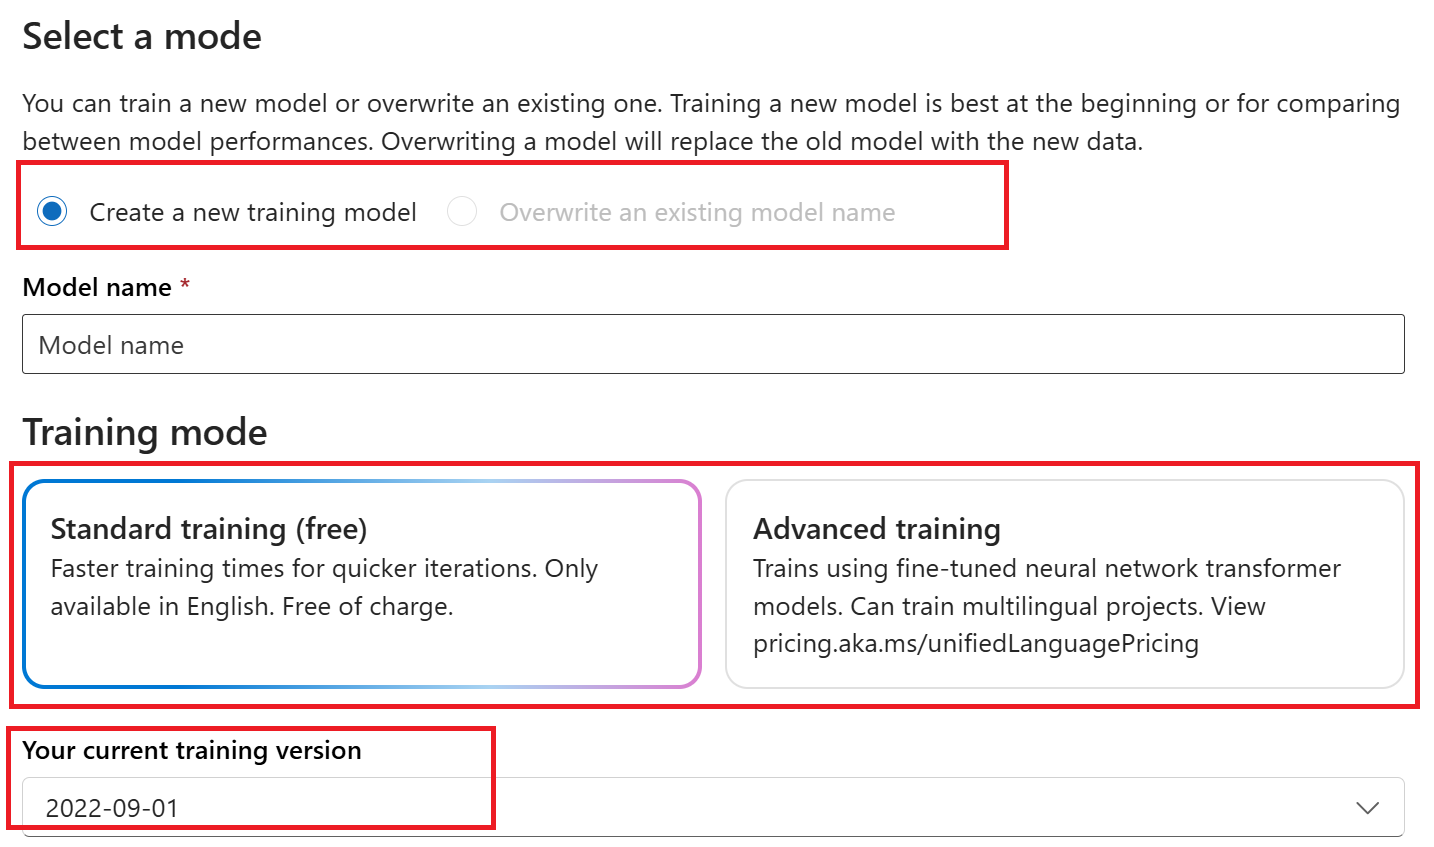
Select Next.
Select one of the Data splitting methods presented in the Train a new model window:
Automatically split the testing set from training data enables the system to split your utterances between the training and testing sets, according to the specified percentages.
Use a manual split of training and testing data enables the system to use the training and testing sets that you assigned and labeled to create your custom model. This option is only available if you added utterances to your testing set when you labeled your utterances.
Select Next and then select Create.
Choose the training job ID from the list. A panel appears that details the training progress, job status, and other details for this job.
Note
- Only successfully completed training jobs generate models.
- Training can take from a few minutes to a few hours based on the count of utterances.
- You can only have one training job running at a time. You can't start other training jobs within the same project until the running job is completed.
Cancel a training job
When you're done with your custom model, you can delete the deployment and model. You can also delete the training and validation files you uploaded to the service, if needed:
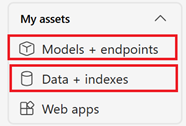
To delete your custom model, on the left navigation pane select My assets → Models + endpoints. Choose the custom model to delete from the Model deployments tab, and then select Delete.
To delete your training and validation files uploaded for training, on the left navigation pane select Data + indexes. Choose the file to delete, and then select Delete.
View model details
After model training is completed, you can view your model details and see how well it performs against the test set.
Note
Using the Automatically split the testing set from training data option may result in different model evaluation result every time you train a new model, as the test set is selected randomly from your utterances. To make sure that the evaluation is calculated on the same test set every time you train a model, make sure to use the Use a manual split of training and testing data option when starting a training job and define your Testing set when you add your utterances.
Model details
Create a GET request using the following URL, headers, and JSON body to get the trained model evaluation summary.
Model Summary
This API returns the summary of your model's evaluation results, including the precision, recall, F1, and confusion matrix of your intents and entities.
Request URL
{ENDPOINT}/language/authoring/analyze-conversations/projects/{projectName}/models/{trainedModelLabel}/evaluation/summary-result?api-version={API-VERSION}
| Placeholder | Value | Example |
|---|---|---|
{ENDPOINT} |
The endpoint for authenticating your API request. | https://<your-custom-subdomain>.cognitiveservices.azure.com |
{PROJECT-NAME} |
The name for your project. This value is case-sensitive. | myProject |
{trainedModelLabel} |
The name for your trained model. This value is case-sensitive. | Model1 |
{API-VERSION} |
The version of the API you're calling. | 2023-04-01 |
Headers
Use the following header to authenticate your request.
| Key | Value |
|---|---|
Ocp-Apim-Subscription-Key |
The key to your resource. Used for authenticating your API requests. |
Response Body
Once you send the request, you get the following response.
{
  "entitiesEvaluation": {
    "confusionMatrix": {
      "additionalProp1": {
        "additionalProp1": {
          "normalizedValue": 0,
          "rawValue": 0
        },
        "additionalProp2": {
          "normalizedValue": 0,
          "rawValue": 0
        },
        "additionalProp3": {
          "normalizedValue": 0,
          "rawValue": 0
        }
      },
      "additionalProp2": {
        "additionalProp1": {
          "normalizedValue": 0,
          "rawValue": 0
        },
        "additionalProp2": {
          "normalizedValue": 0,
          "rawValue": 0
        },
        "additionalProp3": {
          "normalizedValue": 0,
          "rawValue": 0
        }
      },
      "additionalProp3": {
        "additionalProp1": {
          "normalizedValue": 0,
          "rawValue": 0
        },
        "additionalProp2": {
          "normalizedValue": 0,
          "rawValue": 0
        },
        "additionalProp3": {
          "normalizedValue": 0,
          "rawValue": 0
        }
      }
    },
    "entities": {
      "additionalProp1": {
        "f1": 0,
        "precision": 0,
        "recall": 0,
        "truePositivesCount": 0,
        "trueNegativesCount": 0,
        "falsePositivesCount": 0,
        "falseNegativesCount": 0
      },
      "additionalProp2": {
        "f1": 0,
        "precision": 0,
        "recall": 0,
        "truePositivesCount": 0,
        "trueNegativesCount": 0,
        "falsePositivesCount": 0,
        "falseNegativesCount": 0
      },
      "additionalProp3": {
        "f1": 0,
        "precision": 0,
        "recall": 0,
        "truePositivesCount": 0,
        "trueNegativesCount": 0,
        "falsePositivesCount": 0,
        "falseNegativesCount": 0
      }
    },
    "microF1": 0,
    "microPrecision": 0,
    "microRecall": 0,
    "macroF1": 0,
    "macroPrecision": 0,
    "macroRecall": 0
  },
  "intentsEvaluation": {
    "confusionMatrix": {
      "additionalProp1": {
        "additionalProp1": {
          "normalizedValue": 0,
          "rawValue": 0
        },
        "additionalProp2": {
          "normalizedValue": 0,
          "rawValue": 0
        },
        "additionalProp3": {
          "normalizedValue": 0,
          "rawValue": 0
        }
      },
      "additionalProp2": {
        "additionalProp1": {
          "normalizedValue": 0,
          "rawValue": 0
        },
        "additionalProp2": {
          "normalizedValue": 0,
          "rawValue": 0
        },
        "additionalProp3": {
          "normalizedValue": 0,
          "rawValue": 0
        }
      },
      "additionalProp3": {
        "additionalProp1": {
          "normalizedValue": 0,
          "rawValue": 0
        },
        "additionalProp2": {
          "normalizedValue": 0,
          "rawValue": 0
        },
        "additionalProp3": {
          "normalizedValue": 0,
          "rawValue": 0
        }
      }
    },
    "intents": {
      "additionalProp1": {
        "f1": 0,
        "precision": 0,
        "recall": 0,
        "truePositivesCount": 0,
        "trueNegativesCount": 0,
        "falsePositivesCount": 0,
        "falseNegativesCount": 0
      },
      "additionalProp2": {
        "f1": 0,
        "precision": 0,
        "recall": 0,
        "truePositivesCount": 0,
        "trueNegativesCount": 0,
        "falsePositivesCount": 0,
        "falseNegativesCount": 0
      },
      "additionalProp3": {
        "f1": 0,
        "precision": 0,
        "recall": 0,
        "truePositivesCount": 0,
        "trueNegativesCount": 0,
        "falsePositivesCount": 0,
        "falseNegativesCount": 0
      }
    },
    "microF1": 0,
    "microPrecision": 0,
    "microRecall": 0,
    "macroF1": 0,
    "macroPrecision": 0,
    "macroRecall": 0
  },
  "evaluationOptions": {
    "kind": "percentage",
    "trainingSplitPercentage": 0,
    "testingSplitPercentage": 0
  }
}
Model Results
This API returns the individual results for each utterance including their expected and actual predictions for intents and entities.
Request URL
{ENDPOINT}/language/authoring/analyze-conversations/projects/{projectName}/models/{trainedModelLabel}/evaluation/result?top={top}&skip={skip}&maxpagesize={maxpagesize}&api-version={API-VERSION}
| Placeholder | Value | Example |
|---|---|---|
{ENDPOINT} |
The endpoint for authenticating your API request. | https://<your-custom-subdomain>.cognitiveservices.azure.com |
{PROJECT-NAME} |
The name for your project. This value is case-sensitive. | myProject |
{trainedModelLabel} |
The name for your trained model. This value is case-sensitive. | Model1 |
{API-VERSION} |
The version of the API you're calling. | 2023-04-01 |
{top} |
The maximum number of utterances to return from the collection. Optional. | 100 |
{skip} |
An offset into the collection of the first utterance to be returned. Optional. | 100 |
{maxpagesize} |
The maximum number of utterances to include in a single response. Optional | 100 |
Headers
Use the following header to authenticate your request.
| Key | Value |
|---|---|
Ocp-Apim-Subscription-Key |
The key to your resource. Used for authenticating your API requests. |
Response Body
Once you send the request, you get the following response.
{
  "value": [
    {
      "text": "send the email",
      "language": "en-us",
      "entitiesResult": {
        "expectedEntities": [],
        "predictedEntities": []
      },
      "intentsResult": {
        "expectedIntent": "SendEmail",
        "predictedIntent": "SendEmail"
      }
    },
    {
      "text": "send a mail to daniel",
      "language": "en-us",
      "entitiesResult": {
        "expectedEntities": [
          {
            "category": "ContactName",
            "offset": 15,
            "length": 6
          }
        ],
        "predictedEntities": [
          {
            "category": "ContactName",
            "offset": 15,
            "length": 6
          }
        ]
      },
      "intentsResult": {
        "expectedIntent": "SendEmail",
        "predictedIntent": "SendEmail"
      }
    },
    {
      "text": "i forgot to add an important part to that email to james . please set it up to edit",
      "language": "en-us",
      "entitiesResult": {
        "expectedEntities": [
          {
            "category": "ContactName",
            "offset": 51,
            "length": 5
          }
        ],
        "predictedEntities": [
          {
            "category": "Category",
            "offset": 19,
            "length": 9
          },
          {
            "category": "ContactName",
            "offset": 51,
            "length": 5
          }
        ]
      },
      "intentsResult": {
        "expectedIntent": "AddMore",
        "predictedIntent": "AddMore"
      }
    },
    {
      "text": "send email to a and tian",
      "language": "en-us",
      "entitiesResult": {
        "expectedEntities": [
          {
            "category": "ContactName",
            "offset": 14,
            "length": 1
          },
          {
            "category": "ContactName",
            "offset": 20,
            "length": 4
          }
        ],
        "predictedEntities": [
          {
            "category": "ContactName",
            "offset": 14,
            "length": 1
          },
          {
            "category": "ContactName",
            "offset": 20,
            "length": 4
          }
        ]
      },
      "intentsResult": {
        "expectedIntent": "SendEmail",
        "predictedIntent": "SendEmail"
      }
    },
    {
      "text": "send thomas an email",
      "language": "en-us",
      "entitiesResult": {
        "expectedEntities": [
          {
            "category": "ContactName",
            "offset": 5,
            "length": 6
          }
        ],
        "predictedEntities": [
          {
            "category": "ContactName",
            "offset": 5,
            "length": 6
          }
        ]
      },
      "intentsResult": {
        "expectedIntent": "SendEmail",
        "predictedIntent": "SendEmail"
      }
    },
    {
      "text": "i need to add more to the email message i am sending to vincent",
      "language": "en-us",
      "entitiesResult": {
        "expectedEntities": [
          {
            "category": "ContactName",
            "offset": 56,
            "length": 7
          }
        ],
        "predictedEntities": [
          {
            "category": "ContactName",
            "offset": 56,
            "length": 7
          }
        ]
      },
      "intentsResult": {
        "expectedIntent": "AddMore",
        "predictedIntent": "AddMore"
      }
    },
    {
      "text": "send an email to lily roth and abc123@microsoft.com",
      "language": "en-us",
      "entitiesResult": {
        "expectedEntities": [
          {
            "category": "ContactName",
            "offset": 17,
            "length": 9
          }
        ],
        "predictedEntities": [
          {
            "category": "ContactName",
            "offset": 17,
            "length": 9
          }
        ]
      },
      "intentsResult": {
        "expectedIntent": "SendEmail",
        "predictedIntent": "SendEmail"
      }
    },
    {
      "text": "i need to add something else to my email to cheryl",
      "language": "en-us",
      "entitiesResult": {
        "expectedEntities": [
          {
            "category": "ContactName",
            "offset": 44,
            "length": 6
          }
        ],
        "predictedEntities": [
          {
            "category": "ContactName",
            "offset": 44,
            "length": 6
          }
        ]
      },
      "intentsResult": {
        "expectedIntent": "AddMore",
        "predictedIntent": "AddMore"
      }
    },
    {
      "text": "send an email to larry , joseph and billy larkson",
      "language": "en-us",
      "entitiesResult": {
        "expectedEntities": [
          {
            "category": "ContactName",
            "offset": 17,
            "length": 5
          },
          {
            "category": "ContactName",
            "offset": 25,
            "length": 6
          },
          {
            "category": "ContactName",
            "offset": 36,
            "length": 13
          }
        ],
        "predictedEntities": [
          {
            "category": "ContactName",
            "offset": 17,
            "length": 5
          },
          {
            "category": "ContactName",
            "offset": 25,
            "length": 6
          },
          {
            "category": "ContactName",
            "offset": 36,
            "length": 13
          }
        ]
      },
      "intentsResult": {
        "expectedIntent": "SendEmail",
        "predictedIntent": "SendEmail"
      }
    },
    {
      "text": "send mail to dorothy",
      "language": "en-us",
      "entitiesResult": {
        "expectedEntities": [
          {
            "category": "ContactName",
            "offset": 13,
            "length": 7
          }
        ],
        "predictedEntities": [
          {
            "category": "ContactName",
            "offset": 13,
            "length": 7
          }
        ]
      },
      "intentsResult": {
        "expectedIntent": "SendEmail",
        "predictedIntent": "SendEmail"
      }
    }
  ],
  "nextLink": "{Endpoint}/language/authoring/analyze-conversations/projects/{projectName}/models/{trainedModelLabel}/evaluation/result/?api-version=2022-10-01-preview&top={top}&skip={skip}&maxpagesize={maxpagesize}"
}
Load or export model data
Load model data
Create a POST request using the following URL, headers, and JSON body to load your model data to your project.
Request URL
Use the following URL when creating your API request. Replace the placeholder values with your own values.
{ENDPOINT}/language/authoring/analyze-conversations/projects/{PROJECT-NAME}/models/{MODEL-NAME}:load-snapshot?stringIndexType=Utf16CodeUnit&api-version={API-VERSION}
| Placeholder | Value | Example |
|---|---|---|
{ENDPOINT} |
The endpoint for authenticating your API request. | https://<your-custom-subdomain>.cognitiveservices.azure.com |
{PROJECT-NAME} |
The name for your project. This value is case-sensitive. | EmailApp |
{API-VERSION} |
The version of the API you're calling. | 2022-10-01-preview |
{MODEL-NAME} |
The name of your model. This value is case-sensitive. | v1 |
Headers
Use the following header to authenticate your request.
| Key | Value |
|---|---|
Ocp-Apim-Subscription-Key |
The key to your resource. Used for authenticating your API requests. |
Once you send your API request, you receive a 202 response indicating success. In the response headers, extract the operation-___location value formatted like this:
{ENDPOINT}/language/authoring/analyze-conversations/projects/{PROJECT-NAME}/models/{MODEL-NAME}/jobs/{JOB-ID}?api-version={API-VERSION}
JOB-ID is used to identify your request, since this operation is asynchronous. Use this URL to get the status of your model data loading, using the same authentication method.
Export model data
Create a POST request using the following URL, headers, and JSON body to export your model data.
Request URL
Use the following URL when creating your API request. Replace the placeholder values with your own values.
{ENDPOINT}/language/authoring/analyze-conversations/projects/{PROJECT-NAME}/:export?stringIndexType=Utf16CodeUnit&api-version={API-VERSION}&trainedModelLabel={MODEL-NAME}
| Placeholder | Value | Example |
|---|---|---|
{ENDPOINT} |
The endpoint for authenticating your API request. | https://<your-custom-subdomain>.cognitiveservices.azure.com |
{PROJECT-NAME} |
The name for your project. This value is case-sensitive. | EmailApp |
{API-VERSION} |
The version of the API you're calling. | 2022-10-01-preview |
{MODEL-NAME} |
The name of your model. This value is case-sensitive. | v1 |
Headers
Use the following header to authenticate your request.
| Key | Value |
|---|---|
Ocp-Apim-Subscription-Key |
The key to your resource. Used for authenticating your API requests. |
Once you send your API request, you receive a 202 response indicating success. In the response headers, extract the operation-___location value formatted like this:
{ENDPOINT}/language/authoring/analyze-conversations/projects/{PROJECT-NAME}/jobs/{JOB-ID}?api-version={API-VERSION}
JOB-ID is used to identify your request, since this operation is asynchronous. Use this URL to get the exported project JSON, using the same authentication method.
Delete model
Create a DELETE request using the following URL, headers, and JSON body to delete a model.
Request URL
{ENDPOINT}/language/authoring/analyze-conversations/projects/{projectName}/models/{trainedModelLabel}?api-version={API-VERSION}
| Placeholder | Value | Example |
|---|---|---|
{YOUR-ENDPOINT} |
The endpoint for authenticating your API request. | https://<your-custom-subdomain>.cognitiveservices.azure.com |
{PROJECT-NAME} |
The name for your project. This value is case-sensitive. | myProject |
{trainedModelLabel} |
The name for your model name. This value is case-sensitive. | model1 |
{API-VERSION} |
The version of the API you're calling. | 2023-04-01 |
Headers
Use the following header to authenticate your request.
| Key | Value |
|---|---|
Ocp-Apim-Subscription-Key |
The key to your resource. Used for authenticating your API requests. |
Once you send your API request, you receive a 204 response indicating success, which means your model is deleted.
As you review how your model performs, learn about the evaluation metrics that are used.
Deploy your model
Once you're satisfied with how your model performs, it's ready to be deployed so you can query it for predictions from utterances. Deploying a model makes it available for use through the prediction API.
After you review the model's performance and decide it can be used in your environment, you need to assign it to a deployment to be able to query it. We recommend creating a deployment named production to which you assign the best model you built so far and use it in your system. You can create another deployment called staging to which you can assign the model you're currently working on to be able to test it. You can have a maximum of 10 deployments in your project.
Submit deployment job
Create a PUT request using the following URL, headers, and JSON body to start deploying a conversational language understanding model.
Request URL
{ENDPOINT}/language/authoring/analyze-conversations/projects/{PROJECT-NAME}/deployments/{DEPLOYMENT-NAME}?api-version={API-VERSION}
| Placeholder | Value | Example |
|---|---|---|
{ENDPOINT} |
The endpoint for authenticating your API request. | https://<your-custom-subdomain>.cognitiveservices.azure.com |
{PROJECT-NAME} |
The name for your project. This value is case-sensitive. | myProject |
{DEPLOYMENT-NAME} |
The name for your deployment. This value is case-sensitive. | staging |
{API-VERSION} |
The version of the API you're calling. | 2023-04-01 |
Headers
Use the following header to authenticate your request.
| Key | Value |
|---|---|
Ocp-Apim-Subscription-Key |
The key to your resource. Used for authenticating your API requests. |
Request Body
{
  "trainedModelLabel": "{MODEL-NAME}",
}
| Key | Placeholder | Value | Example |
|---|---|---|---|
| trainedModelLabel | {MODEL-NAME} |
The model name that is assigned to your deployment. You can only assign successfully trained models. This value is case-sensitive. | myModel |
Once you send your API request, you receive a 202 response indicating success. In the response headers, extract the operation-___location value formatted like this:
{ENDPOINT}/language/authoring/analyze-conversations/projects/{PROJECT-NAME}/deployments/{DEPLOYMENT-NAME}/jobs/{JOB-ID}?api-version={API-VERSION}
You can use this URL to get the deployment job status.
Get deployment job status
When you send a successful deployment request, the full request URL for checking the job's status (including your endpoint, project name, and job ID) is contained in the response's operation-___location header.
Use the following GET request to get the status of your deployment job. Replace the placeholder values with your own values.
Request URL
{ENDPOINT}/language/authoring/analyze-conversations/projects/{PROJECT-NAME}/deployments/{DEPLOYMENT-NAME}/jobs/{JOB-ID}?api-version={API-VERSION}
| Placeholder | Value | Example |
|---|---|---|
{ENDPOINT} |
The endpoint for authenticating your API request. | https://<your-custom-subdomain>.cognitiveservices.azure.com |
{PROJECT-NAME} |
The name for your project. This value is case-sensitive. | myProject |
{DEPLOYMENT-NAME} |
The name for your deployment. This value is case-sensitive. | staging |
{JOB-ID} |
The ID for locating your model's training status. | xxxxxxxx-xxxx-xxxx-xxxx-xxxxxxxxxxxxx |
{API-VERSION} |
The version of the API you're calling. | 2023-04-01 |
Headers
Use the following header to authenticate your request.
| Key | Value |
|---|---|
Ocp-Apim-Subscription-Key |
The key to your resource. Used for authenticating your API requests. |
Response Body
Once you send the request, you'll get the following response. Keep polling this endpoint until the status parameter changes to "succeeded".
{
    "jobId":"{JOB-ID}",
    "createdDateTime":"{CREATED-TIME}",
    "lastUpdatedDateTime":"{UPDATED-TIME}",
    "expirationDateTime":"{EXPIRATION-TIME}",
    "status":"running"
}
Swap deployments
After you're done testing a model assigned to one deployment, you might want to assign it to another deployment. Swapping deployments involves:
- Taking the model assigned to the first deployment, and assigning it to the second deployment.
- Taking the model assigned to the second deployment and assigning it to the first deployment.
For example, you can swap your production and staging deployments when you want to take the model assigned to staging and assign it to production.
Create a POST request using the following URL, headers, and JSON body to start a swap deployments job.
Request URL
{ENDPOINT}/language/authoring/analyze-conversations/projects/{PROJECT-NAME}/deployments/:swap?api-version={API-VERSION}
| Placeholder | Value | Example |
|---|---|---|
{ENDPOINT} |
The endpoint for authenticating your API request. | https://<your-custom-subdomain>.cognitiveservices.azure.com |
{PROJECT-NAME} |
The name for your project. This value is case-sensitive. | myProject |
{API-VERSION} |
The version of the API you're calling. | 2023-04-01 |
Headers
Use the following header to authenticate your request.
| Key | Value |
|---|---|
Ocp-Apim-Subscription-Key |
The key to your resource. Used for authenticating your API requests. |
Request Body
{
  "firstDeploymentName": "{FIRST-DEPLOYMENT-NAME}",
  "secondDeploymentName": "{SECOND-DEPLOYMENT-NAME}"
}
| Key | Placeholder | Value | Example |
|---|---|---|---|
| firstDeploymentName | {FIRST-DEPLOYMENT-NAME} |
The name for your first deployment. This value is case-sensitive. | production |
| secondDeploymentName | {SECOND-DEPLOYMENT-NAME} |
The name for your second deployment. This value is case-sensitive. | staging |
Once you send your API request, you receive a 202 response indicating success.
Delete deployment
Create a DELETE request using the following URL, headers, and JSON body to delete a conversational language understanding deployment.
Request URL
{ENDPOINT}/language/authoring/analyze-conversations/projects/{projectName}/deployments/{deploymentName}?api-version={API-VERSION}
| Placeholder | Value | Example |
|---|---|---|
{ENDPOINT} |
The endpoint for authenticating your API request. | https://<your-custom-subdomain>.cognitiveservices.azure.com |
{PROJECT-NAME} |
The name for your project. This value is case-sensitive. | myProject |
{DEPLOYMENT-NAME} |
The name for your deployment name. This value is case-sensitive. | staging |
{API-VERSION} |
The version of the API you're calling. | 2023-04-01 |
Headers
Use the following header to authenticate your request.
| Key | Value |
|---|---|
Ocp-Apim-Subscription-Key |
The key to your resource. Used for authenticating your API requests. |
Once you send your API request, you receive a 202 response indicating success, which means your deployment is deleted.
Assign deployment resources
You can deploy your project to multiple regions by assigning different Language resources that exist in different regions.
Assigning deployment resources programmatically requires Microsoft Entra authentication**. Microsoft Entra ID is used to confirm you have access to the resources you're interested in assigning to your project for multi-region deployment. To programmatically use Microsoft Entra authentication when making REST API calls, see the Foundry Tools authentication documentation.
Assign resource
Submit a POST request using the following URL, headers, and JSON body to assign deployment resources.
Request URL
Use the following URL when creating your API request. Replace the placeholder values with your own values.
{ENDPOINT}/language/authoring/analyze-conversations/projects/{PROJECT-NAME}/resources/:assign?api-version={API-VERSION}
| Placeholder | Value | Example |
|---|---|---|
{ENDPOINT} |
The endpoint for authenticating your API request. | https://<your-custom-subdomain>.cognitiveservices.azure.com |
{PROJECT-NAME} |
The name for your project. This value is case-sensitive. | myProject |
{API-VERSION} |
The version of the API you're calling. | 2022-10-01-preview |
Headers
Use Microsoft Entra authentication to authenticate this API.
Body
Use the following sample JSON as your body.
{
  "resourcesMetadata": [
    {
      "azureResourceId": "{AZURE-RESOURCE-ID}",
      "customDomain": "{CUSTOM-DOMAIN}",
      "region": "{REGION-CODE}"
    }
  ]
}
| Key | Placeholder | Value | Example |
|---|---|---|---|
azureResourceId |
{AZURE-RESOURCE-ID} |
The full resource ID path you want to assign. Found in the Azure portal under the Properties tab for the resource, within the Resource ID field. | /subscriptions/a0a0a0a0-bbbb-cccc-dddd-e1e1e1e1e1e1/resourceGroups/ContosoResourceGroup/providers/Microsoft.CognitiveServices/accounts/ContosoResource |
customDomain |
{CUSTOM-DOMAIN} |
The custom subdomain of the resource you want to assign. Found in the Azure portal under the Keys and Endpoint tab for the resource, part of the Endpoint field in the URL https://<your-custom-subdomain>.cognitiveservices.azure.com/ |
contosoresource |
region |
{REGION-CODE} |
A region code specifying the region of the resource you want to assign. Found in the Azure portal under the Keys and Endpoint tab for the resource, as part of the Location/Region field. | eastus |
Get assign resource status
Use the following GET request to get the status of your assign deployment resource job. Replace the placeholder values with your own values.
Request URL
{ENDPOINT}/language/authoring/analyze-conversations/projects/{PROJECT-NAME}/resources/assign/jobs/{JOB-ID}?api-version={API-VERSION}
| Placeholder | Value | Example |
|---|---|---|
{ENDPOINT} |
The endpoint for authenticating your API request. | https://<your-custom-subdomain>.cognitiveservices.azure.com |
{PROJECT-NAME} |
The name for your project. This value is case-sensitive. | myProject |
{JOB-ID} |
The job ID for getting your assign deployment status. It's in the operation-___location header value you received from the API in response to your assign deployment resource request. |
xxxxxxxx-xxxx-xxxx-xxxx-xxxxxxxxxxxxx |
{API-VERSION} |
The version of the API you're calling. | 2022-10-01-preview |
Headers
Use the following header to authenticate your request.
| Key | Value |
|---|---|
Ocp-Apim-Subscription-Key |
The key to your resource. Used for authenticating your API requests. |
Response Body
Once you send the request, you get the following response. Keep polling this endpoint until the status parameter changes to "succeeded".
{
    "jobId":"{JOB-ID}",
    "createdDateTime":"{CREATED-TIME}",
    "lastUpdatedDateTime":"{UPDATED-TIME}",
    "expirationDateTime":"{EXPIRATION-TIME}",
    "status":"running"
}
Unassign deployment resources
When unassigning or removing a deployment resource from a project, you also delete all the deployments that are deployed to the resource's region.
Unassign resource
Submit a POST request using the following URL, headers, and JSON body to unassign or remove deployment resources from your project.
Request URL
Use the following URL when creating your API request. Replace the placeholder values with your own values.
{ENDPOINT}/language/authoring/analyze-conversations/projects/{PROJECT-NAME}/resources/:unassign?api-version={API-VERSION}
| Placeholder | Value | Example |
|---|---|---|
{ENDPOINT} |
The endpoint for authenticating your API request. | https://<your-custom-subdomain>.cognitiveservices.azure.com |
{PROJECT-NAME} |
The name for your project. This value is case-sensitive. | myProject |
{API-VERSION} |
The version of the API you're calling. | 2022-10-01-preview |
Headers
Use the following header to authenticate your request.
| Key | Value |
|---|---|
Ocp-Apim-Subscription-Key |
The key to your resource. Used for authenticating your API requests. |
Body
Use the following sample JSON as your body.
{
  "assignedResourceIds": [
    "{AZURE-RESOURCE-ID}"
  ]
}
| Key | Placeholder | Value | Example |
|---|---|---|---|
assignedResourceIds |
{AZURE-RESOURCE-ID} |
The full resource ID path you want to unassign. Found in the Azure portal under the Properties tab for the resource as the Resource ID field. | /subscriptions/a0a0a0a0-bbbb-cccc-dddd-e1e1e1e1e1e1/resourceGroups/ContosoResourceGroup/providers/Microsoft.CognitiveServices/accounts/ContosoResource |
Get unassign resource status
Use the following GET request to get the status of your unassign deployment resources job. Replace the placeholder values with your own values.
Request URL
{ENDPOINT}/language/authoring/analyze-conversations/projects/{PROJECT-NAME}/resources/unassign/jobs/{JOB-ID}?api-version={API-VERSION}
| Placeholder | Value | Example |
|---|---|---|
{ENDPOINT} |
The endpoint for authenticating your API request. | https://<your-custom-subdomain>.cognitiveservices.azure.com |
{PROJECT-NAME} |
The name for your project. This value is case-sensitive. | myProject |
{JOB-ID} |
The job ID for getting your assign deployment status. It's in the operation-___location header value you received from the API in response to your unassign deployment resource request. |
xxxxxxxx-xxxx-xxxx-xxxx-xxxxxxxxxxxxx |
{API-VERSION} |
The version of the API you're calling. | 2022-10-01-preview |
Headers
Use the following header to authenticate your request.
| Key | Value |
|---|---|
Ocp-Apim-Subscription-Key |
The key to your resource. Used for authenticating your API requests. |
Response Body
Once you send the request, you get the following response. Keep polling this endpoint until the status parameter changes to "succeeded".
{
    "jobId":"{JOB-ID}",
    "createdDateTime":"{CREATED-TIME}",
    "lastUpdatedDateTime":"{UPDATED-TIME}",
    "expirationDateTime":"{EXPIRATION-TIME}",
    "status":"running"
}
Send prediction requests to a deployment
After the deployment is added successfully, you can query the deployment for intent and entities predictions from your utterance based on the model you assigned to the deployment. You can query the deployment programmatically through the prediction API or through the client libraries (Azure SDK).
Test the deployed model
Once your model is deployed, you can test it by sending prediction requests to evaluate its performance with real utterances. Testing helps you verify that the model accurately identifies intents and extracts entities as expected before integrating it into your production applications. You can test your deployment using either the REST API or the Azure SDK client libraries.
First you need to get your resource key and endpoint:
Go to your resource overview page in the Azure portal. From the menu on the left side, select Keys and Endpoint. You use the endpoint and key for the API requests

Query your model
Create a POST request using the following URL, headers, and JSON body to start testing a conversational language understanding model.
Request URL
{ENDPOINT}/language/:analyze-conversations?api-version={API-VERSION}
| Placeholder | Value | Example |
|---|---|---|
{ENDPOINT} |
The endpoint for authenticating your API request. | https://<your-custom-subdomain>.cognitiveservices.azure.com |
{API-VERSION} |
The version of the API you're calling. | 2023-04-01 |
Headers
Use the following header to authenticate your request.
| Key | Value |
|---|---|
Ocp-Apim-Subscription-Key |
The key to your resource. Used for authenticating your API requests. |
Request body
{
  "kind": "Conversation",
  "analysisInput": {
    "conversationItem": {
      "id": "1",
      "participantId": "1",
      "text": "Text 1"
    }
  },
  "parameters": {
    "projectName": "{PROJECT-NAME}",
    "deploymentName": "{DEPLOYMENT-NAME}",
    "stringIndexType": "TextElement_V8"
  }
}
| Key | Placeholder | Value | Example |
|---|---|---|---|
participantId |
{JOB-NAME} |
"MyJobName |
|
id |
{JOB-NAME} |
"MyJobName |
|
text |
{TEST-UTTERANCE} |
The utterance that you want to predict its intent and extract entities from. | "Read Matt's email |
projectName |
{PROJECT-NAME} |
The name of your project. This value is case-sensitive. | myProject |
deploymentName |
{DEPLOYMENT-NAME} |
The name of your deployment. This value is case-sensitive. | staging |
Once you send the request, you get the following response for the prediction
Response body
{
  "kind": "ConversationResult",
  "result": {
    "query": "Text1",
    "prediction": {
      "topIntent": "inten1",
      "projectKind": "Conversation",
      "intents": [
        {
          "category": "intent1",
          "confidenceScore": 1
        },
        {
          "category": "intent2",
          "confidenceScore": 0
        },
        {
          "category": "intent3",
          "confidenceScore": 0
        }
      ],
      "entities": [
        {
          "category": "entity1",
          "text": "text1",
          "offset": 29,
          "length": 12,
          "confidenceScore": 1
        }
      ]
    }
  }
}
| Key | Sample Value | Description |
|---|---|---|
| query | "Read Matt's email" | the text you submitted for query. |
| topIntent | "Read" | The predicted intent with highest confidence score. |
| intents | [] | A list of all the intents that were predicted for the query text each of them with a confidence score. |
| entities | [] | array containing list of extracted entities from the query text. |
API response for a conversations project
In a conversations project, you'll get predictions for both your intents and entities that are present within your project.
- The intents and entities include a confidence score between 0.0 to 1.0 associated with how confident the model is about predicting a certain element in your project.
- The top scoring intent is contained within its own parameter.
- Only predicted entities show up in your response.
- Entities indicate:
- The text of the entity that was extracted
- Its start ___location denoted by an offset value
- The length of the entity text denoted by a length value.
You can also use the client libraries provided by the Azure SDK to send requests to your model.
Note
The client library for conversational language understanding is only available for:
- .NET
- Python
Go to your resource overview page in the Azure portal
From the menu on the left side, select Keys and Endpoint. Use endpoint for the API requests and you need the key for
Ocp-Apim-Subscription-Keyheader.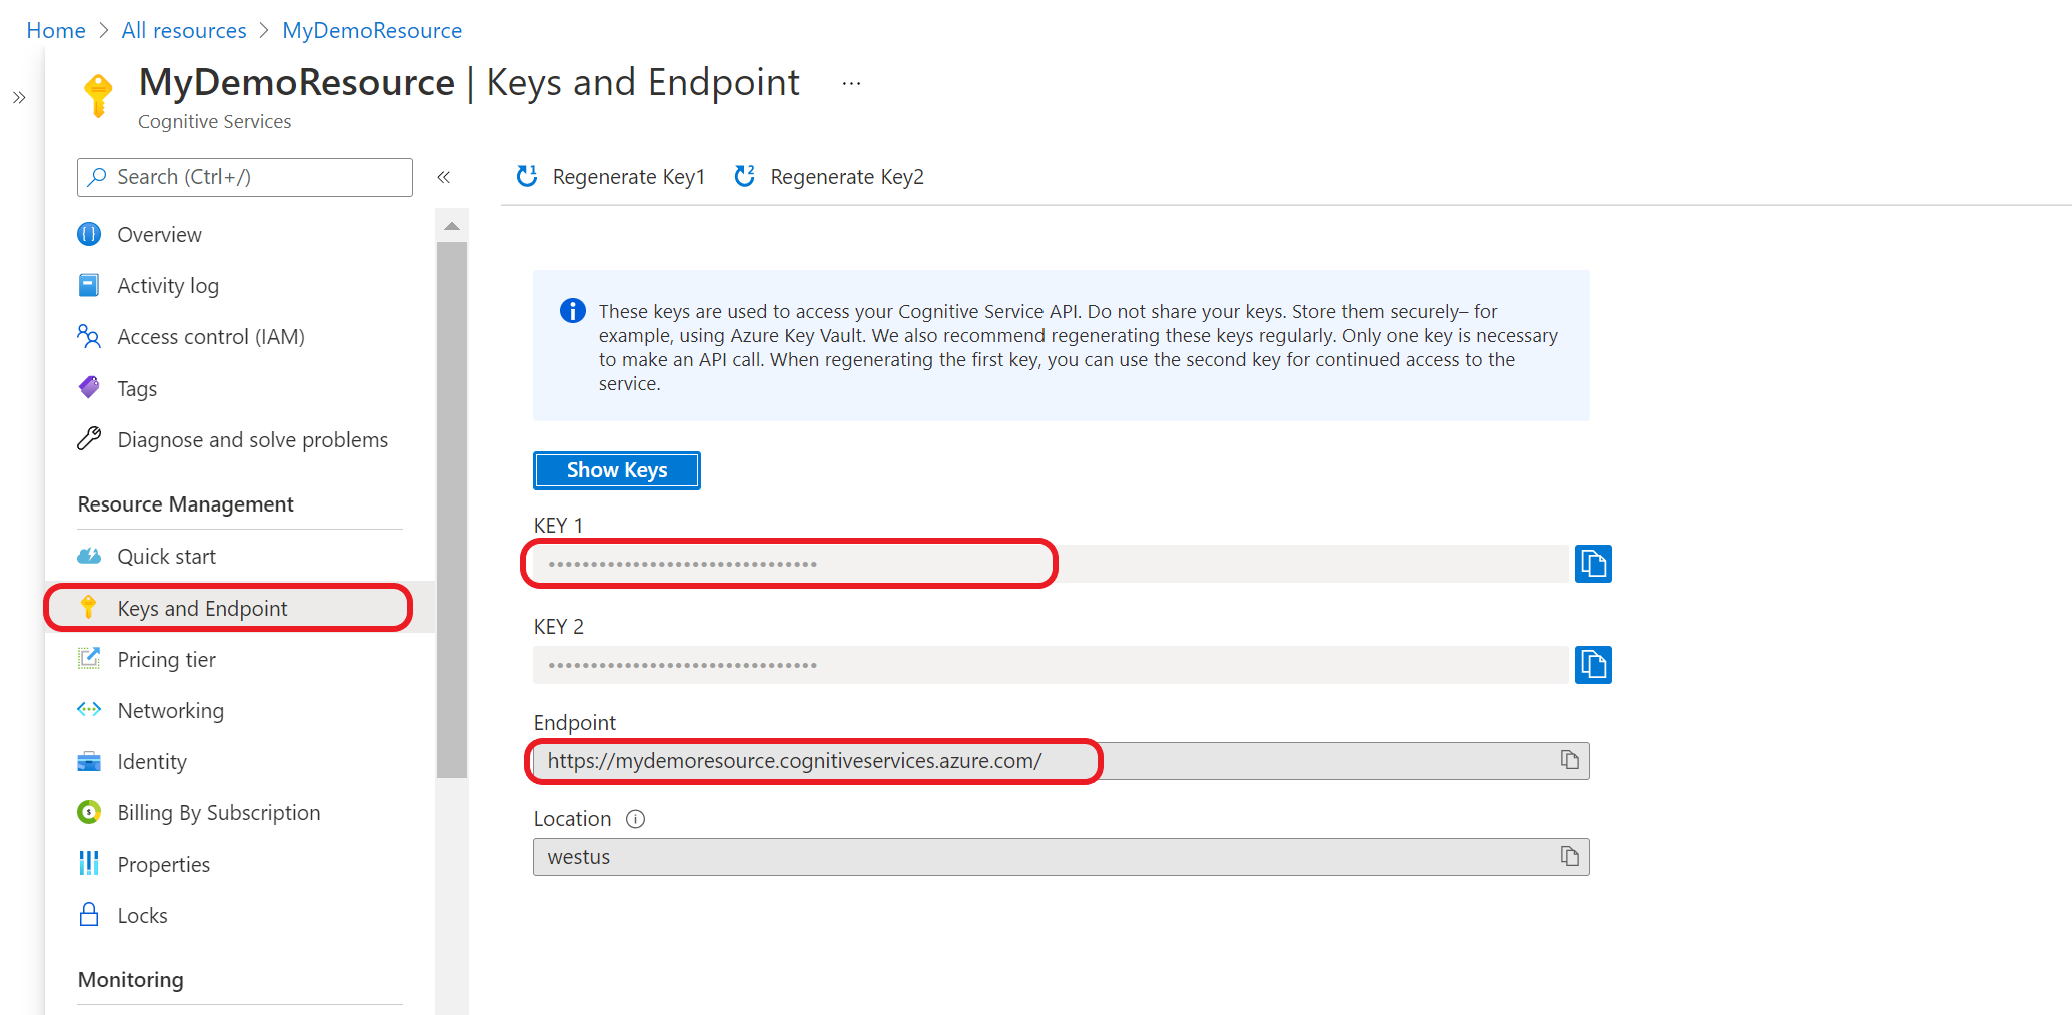
Download and install the client library package for your language of choice:
Language Package version .NET 1.0.0 Python 1.0.0 After you install the client library, use the following samples on GitHub to start calling the API.
For more information, see the following reference documentation: