Note
Access to this page requires authorization. You can try signing in or changing directories.
Access to this page requires authorization. You can try changing directories.
This article shows you how to set up geo-disaster recovery pairing between Event Hubs namespaces and initiate failover. For conceptual information about this feature, see Geo-disaster recovery overview.
Prerequisites
- An Azure subscription. If you don't have one, create a free account before you begin.
- An Event Hubs namespace (Standard, Premium, or Dedicated tier). The Basic tier doesn't support geo-disaster recovery.
Set up geo-disaster recovery pairing
To set up geo-disaster recovery, you create or use an existing primary namespace, create a secondary namespace in a different region, and then pair the two. This pairing gives you an alias that you can use to connect. Because you use an alias, you don't have to change connection strings.
Note
Only new namespaces can be added to your failover pairing.

Create the primary namespace.
Create the secondary namespace in a different region. This step is optional. You can create the secondary namespace while creating the pairing in the next step.
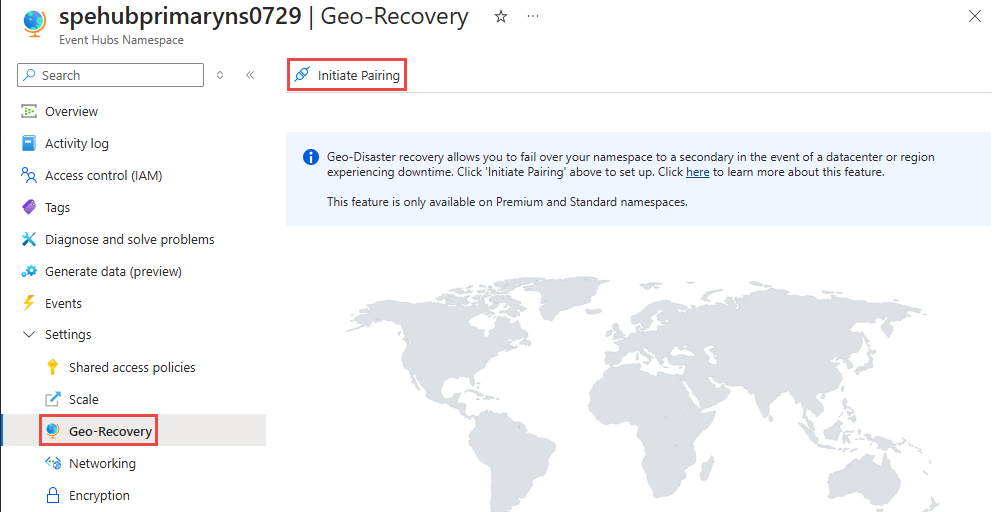
In the Azure portal, navigate to your primary namespace.
Select Geo-recovery on the left menu, and select Initiate pairing on the toolbar.
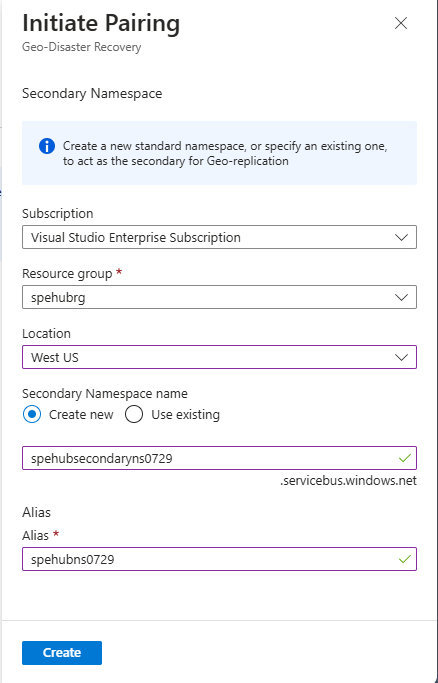
On the Initiate pairing page, follow these steps:
- Select an existing secondary namespace or create one in a different region.
- For Alias, enter an alias for the geo-dr pairing.
- Select Create.
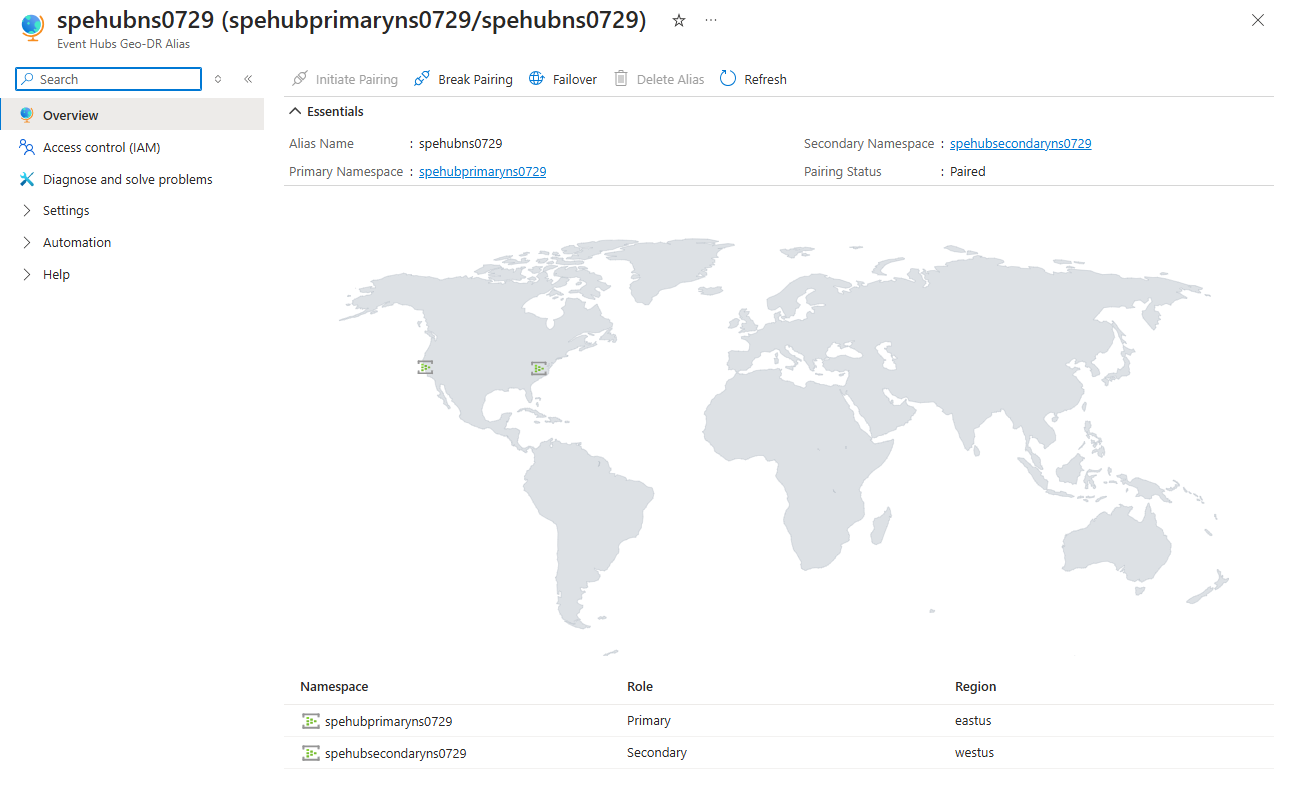
On the Geo-DR Alias page, select Shared access policies on the left menu to access the primary connection string for the alias. Use this connection string instead of using the connection string to the primary or secondary namespace directly.


Finally, add monitoring to detect if a failover is necessary. In most cases, the service is one part of a large ecosystem, and automatic failovers are rarely possible because failovers must often be performed in sync with the remaining subsystem or infrastructure.
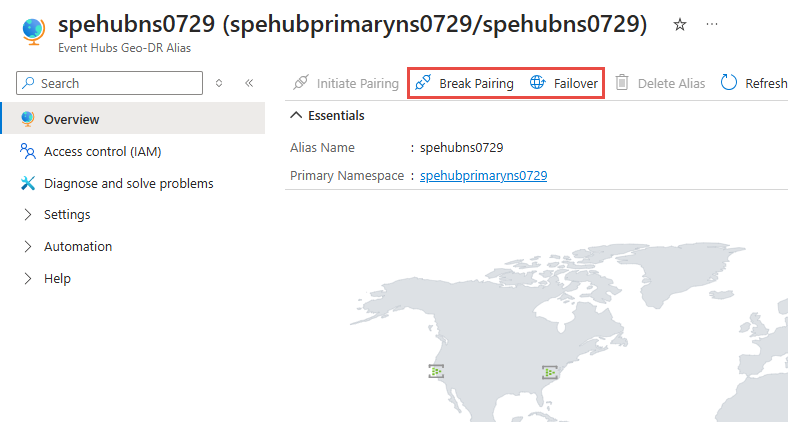
Initiate failover
When you initiate the failover, two steps are required:
- Set up another passive namespace and update the pairing so you can fail over again if another outage occurs.
- Pull messages from the former primary namespace once it's available again. After that, use that namespace for regular messaging outside of your geo-recovery setup, or delete the old primary namespace.
Note
Only fail-forward semantics are supported. When you initiate a failover with geo-disaster recovery, you can optionally re-pair with a new namespace after failover completes. Failing back to the previous primary replica isn't supported.

In the Azure portal, navigate to your primary namespace.
Select Geo-recovery on the left menu.
Select Failover on the toolbar.
Warning
Failing over activates the secondary namespace and removes the primary namespace from the geo-disaster recovery pairing. Create another namespace to have a new geo-disaster recovery pair.
Break pairing
If you made a mistake (for example, you paired the wrong regions during the initial setup), you can break the pairing of the two namespaces at any time.
In the Azure portal, navigate to your primary namespace.
Select Geo-recovery on the left menu.
Select Break pairing on the toolbar.

If you want to use the paired namespaces as regular namespaces, delete the alias.